Dynamics 365 makes it easy to reference information from other entities on a given form using Quick View forms. For example, you can show a contact’s job title, phone number, and email address on an Opportunity. Or, maybe you want to show some specific account information (account number, address, etc) from an associated contact’s record. Adding Quick View forms is quite easy and incredibly useful–keep reading for more information!
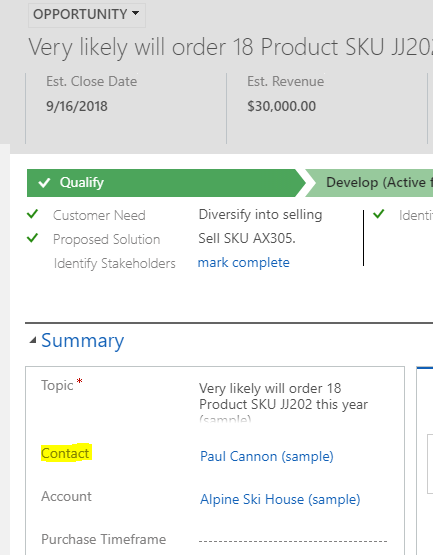
The first thing to know about Quick View forms is that you’ll need to use a lookup field to reference another record in CRM to pull information from. In this example, we’re going to create a Quick View form on the Opportunity record that pulls a Contact’s phone number and email address. A quick check of the Opportunity form can confirm that a contact lookup field exists already:
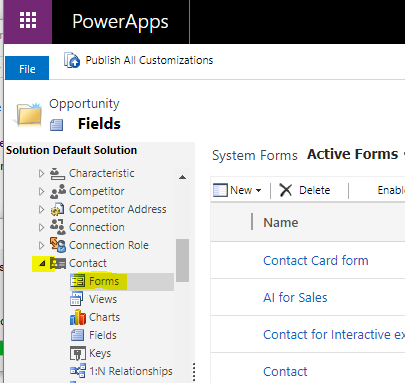
1. Head to Settings–>Customizations–>Customize the System. Expand “Entities”, then scroll down to “Contacts” and expand that as well. Select Forms:
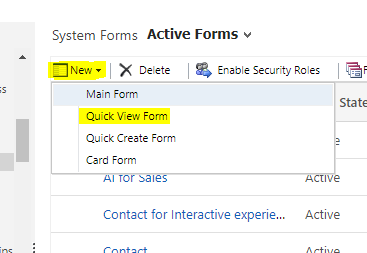
2. Select “New”, then “Quick View Form”:
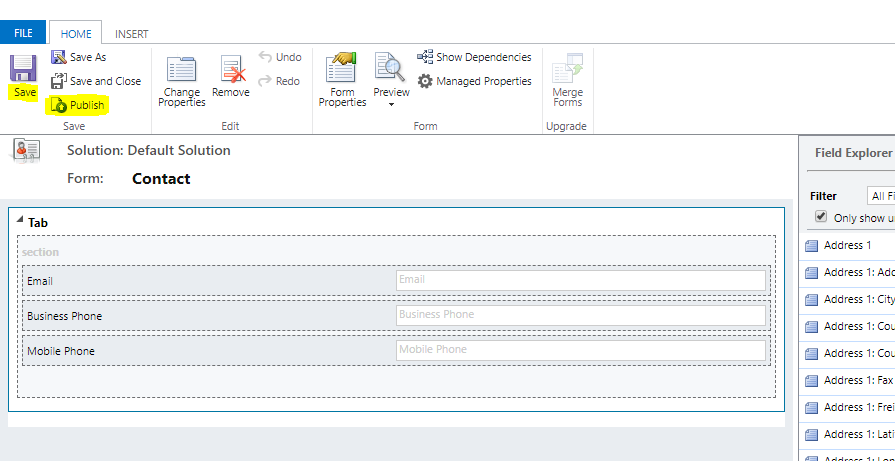
3. Add the fields you want to display on the target record (in our case, Opportunity). Make sure to Save and Publish when you’re done!:
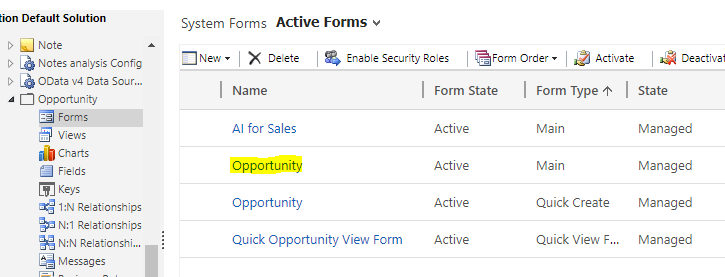
4. Head over to the “Forms” section of the Opportunity entity next. Open the “main” Opportunity form you wish to add the Quick View form to:
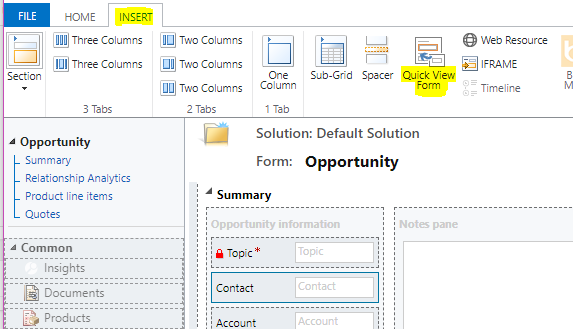
5. Select “Insert”, then “Quick View Form”:
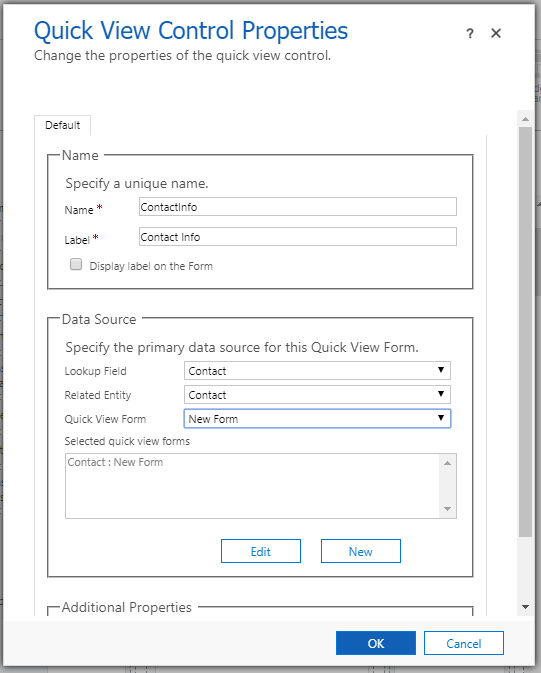
6. Give the Quick View Form a name and label. Under the “Data Source” section, select the appropriate Lookup field (to access the proper entity and record information), then the correct related entity, then the Quick View form you just created. It might be called “New Form” unless you’ve renamed it. Select OK:
7. Reposition the Quick View form to wherever you want it on the form you’re working in. Save and Publish the form!
8. Navigate to a record to see your handiwork:


