Catch your eye with that title? Well, we’ll try our best here and see what we can do with charts in lightning. Reason I picked this one was solely because while I was creating a chart last month, I noticed that there’s a setup area now with charts that allows you to do a lot more with lightning charts. Read More
We’ve already used conditional rich text boxes, showing certain alerts depending on products. However, when working with a client this week, they are using Rich Text to replace the old classic “links” box that was always there on the left. Only issue here is that we have create the rich text component on every page if you want it to always show, but there’s also some flexibility in that (maybe you only want it on the home page and not the account pages like it always showed up before — good and bad I guess).
Sweet and simple – when using global search, you can narrow your search to a specific module filtering on that module. In the example below, zoho will only search the Accounts module:
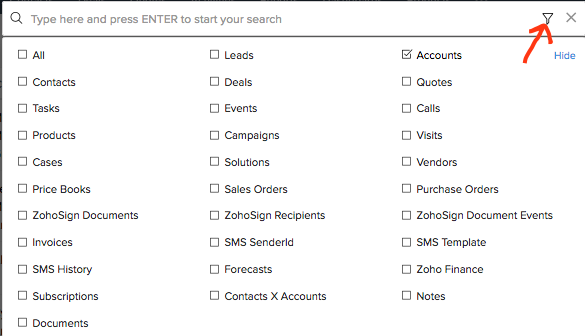
- Accounts
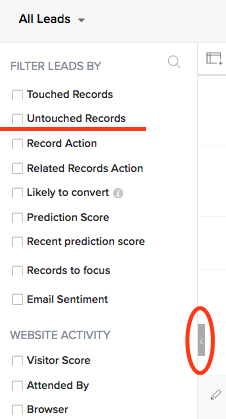 Zoho CRM recently added the ability to filter your records in a view based on whether they have been “touched” – meaning a user or the system (via workflow) has actively created/edited the record. These filters are available in the filter section of the module (to the left after you click a module tab and are looking at a list of records). If you don’t see this filter section, click on the little gray tab to open the filter “drawer”.
When setting the filter, you have the option to choose who and when:
Using this new feature you can quickly find those contacts that haven’t been touched in a while!
Zoho CRM introduced the ability to encrypt specific fields for extra added protection. To add encryption to a field:
- Setup->Customization->Modules and Fields
- Click on the module name, then the layout to open the form
- hover over the field and click the “…” menu, then select Edit Properties
- Click the Encrypt field checkbox:
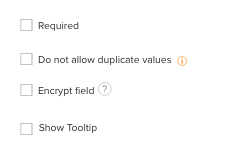
Note that when you export your data, either through Zoho CRM’s export, backup or a report – the data will NOT be encrypted.
Use Zoho CRM’s built-in scoring rules to auto-score and prioritize your leads! You can define sets of rules related to values of fields in the leads module, email activity, survey activity (using Zoho Survey) and document Signing activity (if you’re using Zoho Sign) Here’s how… Read More
Another new feature in 2018 is the ability to set up validation rules for individual fields and customize the error message. Lets take a number field for example, say you want to restrict the value of the field to less than 90 – here’s how to do it:
- Setup->Customization->Modules and Fields

- Click the module your number field is in
- click the Validation Rules Tab
- Click the Blue Create Validation Rule button
- Select the field and choose the rule, in our case Demo Number is greater than 90, then click Next:

- Lastly – enter your error message in our case “Please enter a value less than 90”:

Now when your users try to enter a value outside of the set range this happens:
New for 2018, Zoho CRM has introduced the Portal (Enterprise edition)!! Give your customers/vendors self-service access to the information they need with Zoho CRM’s new Portal feature. Its easy to set up and use too! Lets walk through setting up a customer portal…
STEP 1: Configure your Portal
- Setup(tool icon, upper right)-> Channels->Portals
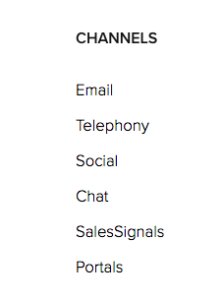
- Enter a name to complete your portal URL (if this if the first portal you are setting up)
- Create your first portal
- Name it (e.g. Customer)
- Select Which modules you will grant access to (e.g. Contacts, Quotes, Invoices, Cases)
- For each module, step through and select which fields a portal user can see
- Click Finish
STEP 2: Invite Customers to your portal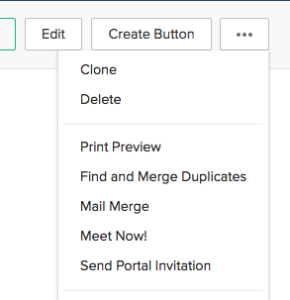
- Open the contact record of the customer you want to invite
- Click the “…” menu (upper right), then select Invite to Portal
- Select the portal (if you have more than one)
- Send the invite.
STEP 3: Customer Signs up for portal access
- Customer Receives Invite, clicks link and sets up a password.
- Customer can now see ONLY the information related it his/her contact record that you granted permission to!
customers can login and check on the status of their orders, or cases, update their contact info, etc… and the best news… it’s FREE!
So this isn’t as much a tip but more of a discussion (welcoming thoughts and comments below). Had a client that wanted 2 factor authentication, but wanted more than just the typical “text me when I login from a different machine” type of security. There’s definitely some considerations here…. Read More
Working with my home page, I wanted to add in some charts to make it a bit fancier. We’ve discussed lists (views) and hiding things on the home page but not how to do charts. Here, we’ll do a chart or two but also discuss the issue of reports created in classic (it’s easy, but has to be noted). Read More

