Once you have finished getting all your data into a CRM like Salesforce, reporting becomes then next important task to tackle. There are several different types of reports you can generate and this blog will cover creating joined reports in Salesforce.
What Is A Joined Report?
With a joined report you can view different types of information in a single report. Typically you would use a joined report to look at your data across different Salesforce objects.
Here is an example: You want to prioritize the opportunities that will be of the highest value to you and you also want to see which of these accounts have open cases that high-priority.
Joined reports can be a combination of standard and custom report types but must have some link to tie the data together across the reports. In the above example, the Opportunities and Cases both are tied to the same Account.
How Do I Create A Joined Report in Salesforce?
- Go to the Reports tab and click New Report
- Select the principal report type for the report and click Continue. This will control how the common fields even if they are named differently or used in a different way in the other report.
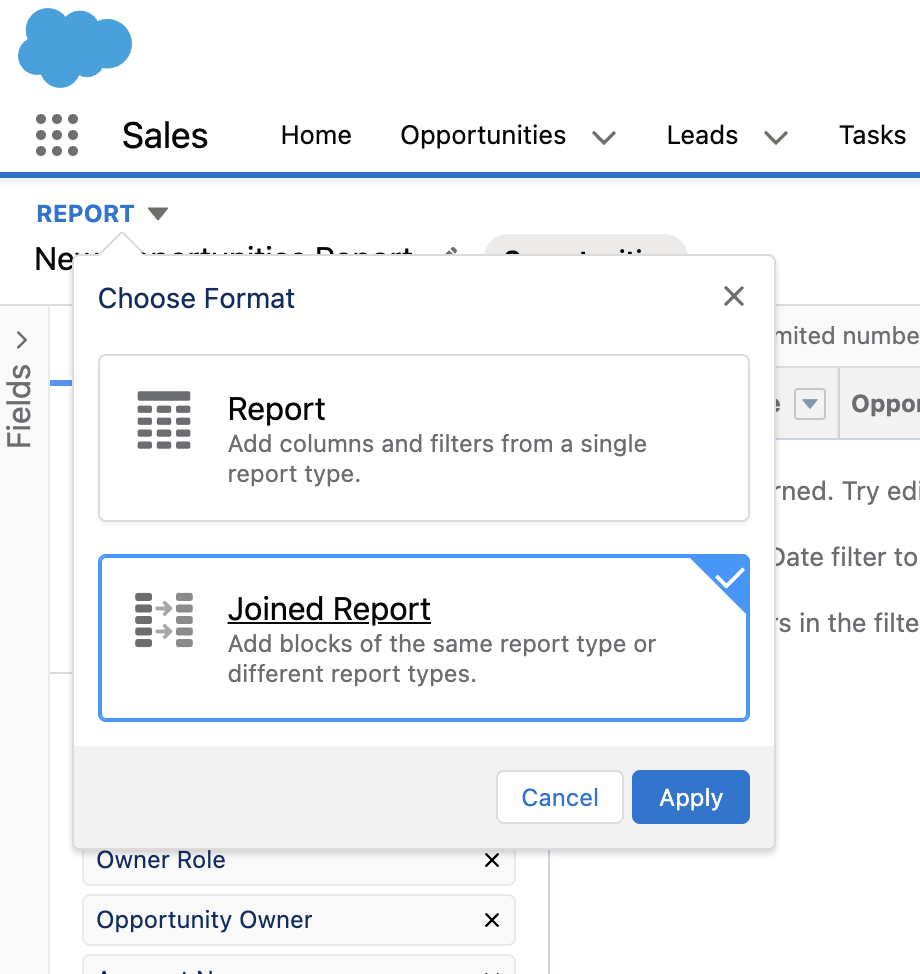
- In top left corner, click the down arrow next to report and choose Joined Report and click Apply.
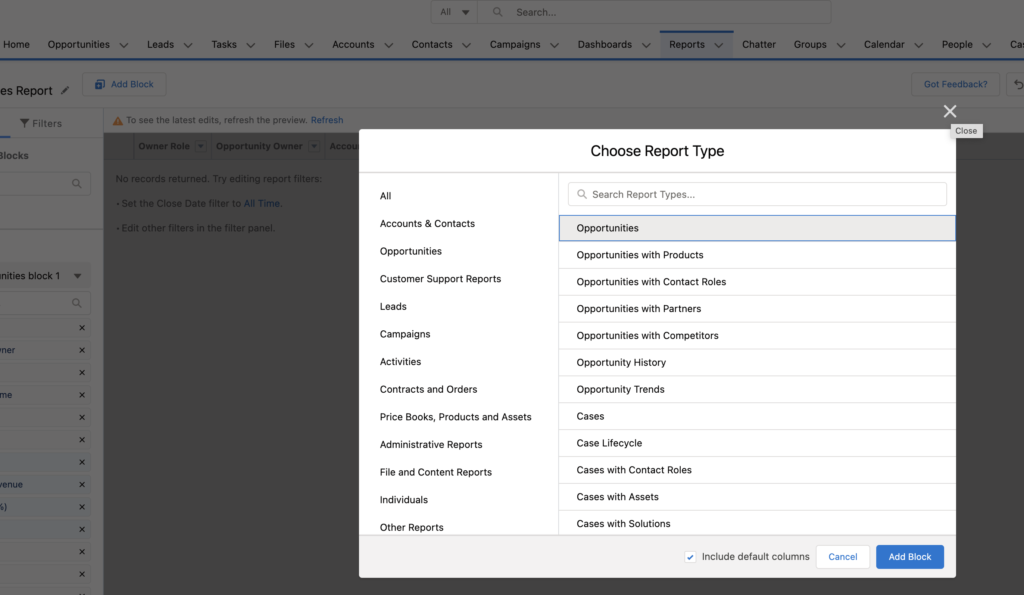
- Once this is done, you will need to add one or more blocks to the joined report. Click Add Block, choose the report type and click Add Block. Once you do this, scroll to the right and you will see the fields for the added report after all the fields from the principal report. You can repeat this process to add additional blocks.
- You now have your joined report. Go ahead and set up the columns, filters, etc to create the report exactly as you need it.
Please contact us at info@marksgroup.net for any Salesforce questions or support you need. Feel free to comment below. We’d love to hear your thoughts!


