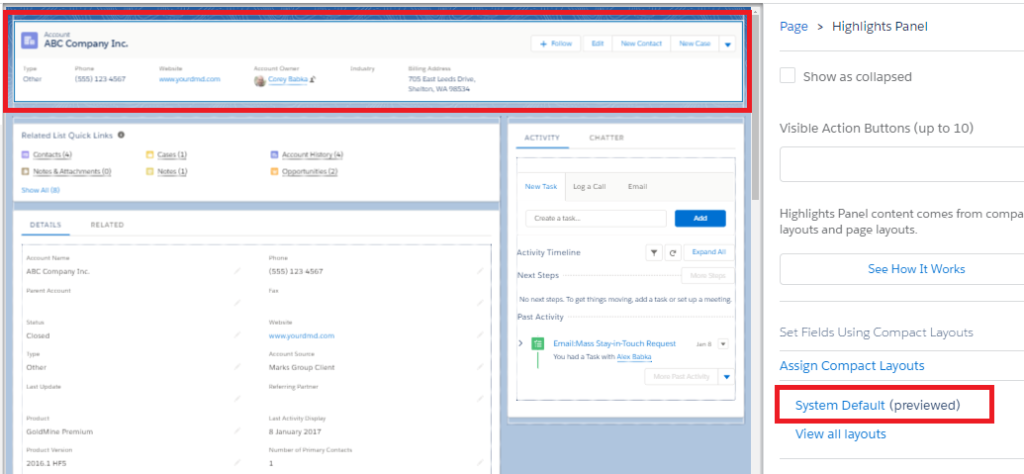
Default layouts might not include everything in the header that you want, but you can change that with a little bit of jumping through pages. What’s whacky to me is that it’s actually controlled in other pages, but you get there from the edit page dialog that we’ve been using lately. I’m sure there might be an easier way (I welcome the comments to help out) but for now, here goes….
First, as usual start with the edit page (gear icon) in upper right.

From here, click on the header portion of the preview, which gives you options on the right for the layout. As it says, it’s controlled via the compact layouts (those little pages when you hover over the recent items). What does work well though is that when you click it, you jump right to that page in a new tab (nice design Salesforce!)….

Unfortunately, the system default is what’s there, so when you select that and try to change it, your only option is to clone it, create a new one and then assign that one to everyone (which is what I had to do). Select clone to start working.
Here I added in the product and messed around a bit to remove and make it smaller. Click Save when done.

After you save it, you do have to set the compact view assignment, where once clicked you can assign it to different groups. Here I just switched the default to my new view.

Once saved, all I did was refresh the page in the edit layout (or just view it). Seems to save it right away just by changing the compact layout. You can see my new changes are here including the product…


